 I'm still working on my arm warmers, and they're causing me a bit of frustration. I'm doing simple ribbing all the way down, and I didn't think it was necessary to bind off in pattern. Oops. Turns out if you do a normal bind off, you "lock" the bottom so that it can't stretch to accommodate your hand. This one is half-on, half-off the needles, because if there's anything in this whole world that I hate passionately, it's picking up stitches. But the good news is, once I suck it up and pick up those stitches, and then bind off correctly, I will have one finished arm warmer, with only one to go.
 I've found myself short on washcloths for cleanup after the prodigious amounts of gardening I've been doing. I managed to cover every spare surface of my home in potting soil after a massive repotting project involving almost 30 plants. So I've decided to knit up a couple of washcloths especially for gardening purposes. Here are two small ones in progress.
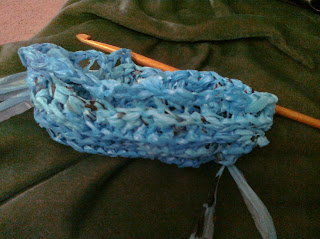
 The Plarn tote bag is coming along. It's waiting on straps and embellishments. I've decided it needs some contrast in the form of crocheted flowers, which I'll make from the other colors of Plarn I created a couple weekends ago. I have enough Plarn left for a second bag, which I may whip up as another handy holiday gift. With Halloween only a couple days away, the pre-holiday crafting season is passing us by quickly. I'm hoping to have my gifts ready by the end of November so that I can fully enjoy all that December has to offer, unencumbered by last-minute stresses. I am also hoping for world peace, an end to poverty, and season 2 of Firefly. If you have a bridge for sale, drop me a comment!
 In additional gift-making, I finished the tatted bracelet, and whipped up some matching earrings. I'm really pleased with how they turned out, but I'm still having difficulty weaving in ends. I'm going to try out the "Big Eye" needle to see if this is any easier. So far I've been using embroidery needles, and their flared eyes cause too much of a gap in the stitches, leaving a really ugly mess wherever my ends go. I am completely open to suggestions. No, really, I need to know your secret!
I decided to experiment with a project based on "How to Be an Explorer of the World" by Keri Smith. In the book, she talks about the importance of pockets to hold an explorer's tools, including a magnifying glass, field notes, and of course, your samples and finds. Since a lot of my clothes don't have suitable pockets, I created an "Explorer's Pocket" in honor of Keri's book. It's just the right size for your field notes and small finds, and it has a rolling design kind that reminds me of my favorite style of journals, or those roll-up knitting needle cases. By the way, if you're not familiar with Keri Smith and her fabulous books, you should check out her website. There's even a drawing tool to play with! How awesome is that? You can see more pictures of this piece on my Ravelry entry for it.
That's all for today. Feel free to tell me what you're working on in the comments! I'd love to hear from you! Now if you'll pardon me, I have to go off and age. I believe these things are generally associated with celebrations and such.


